Tuesday, October 15, 2013

Card Creations


Hi Friends!

Today I am going to share more cards with you!
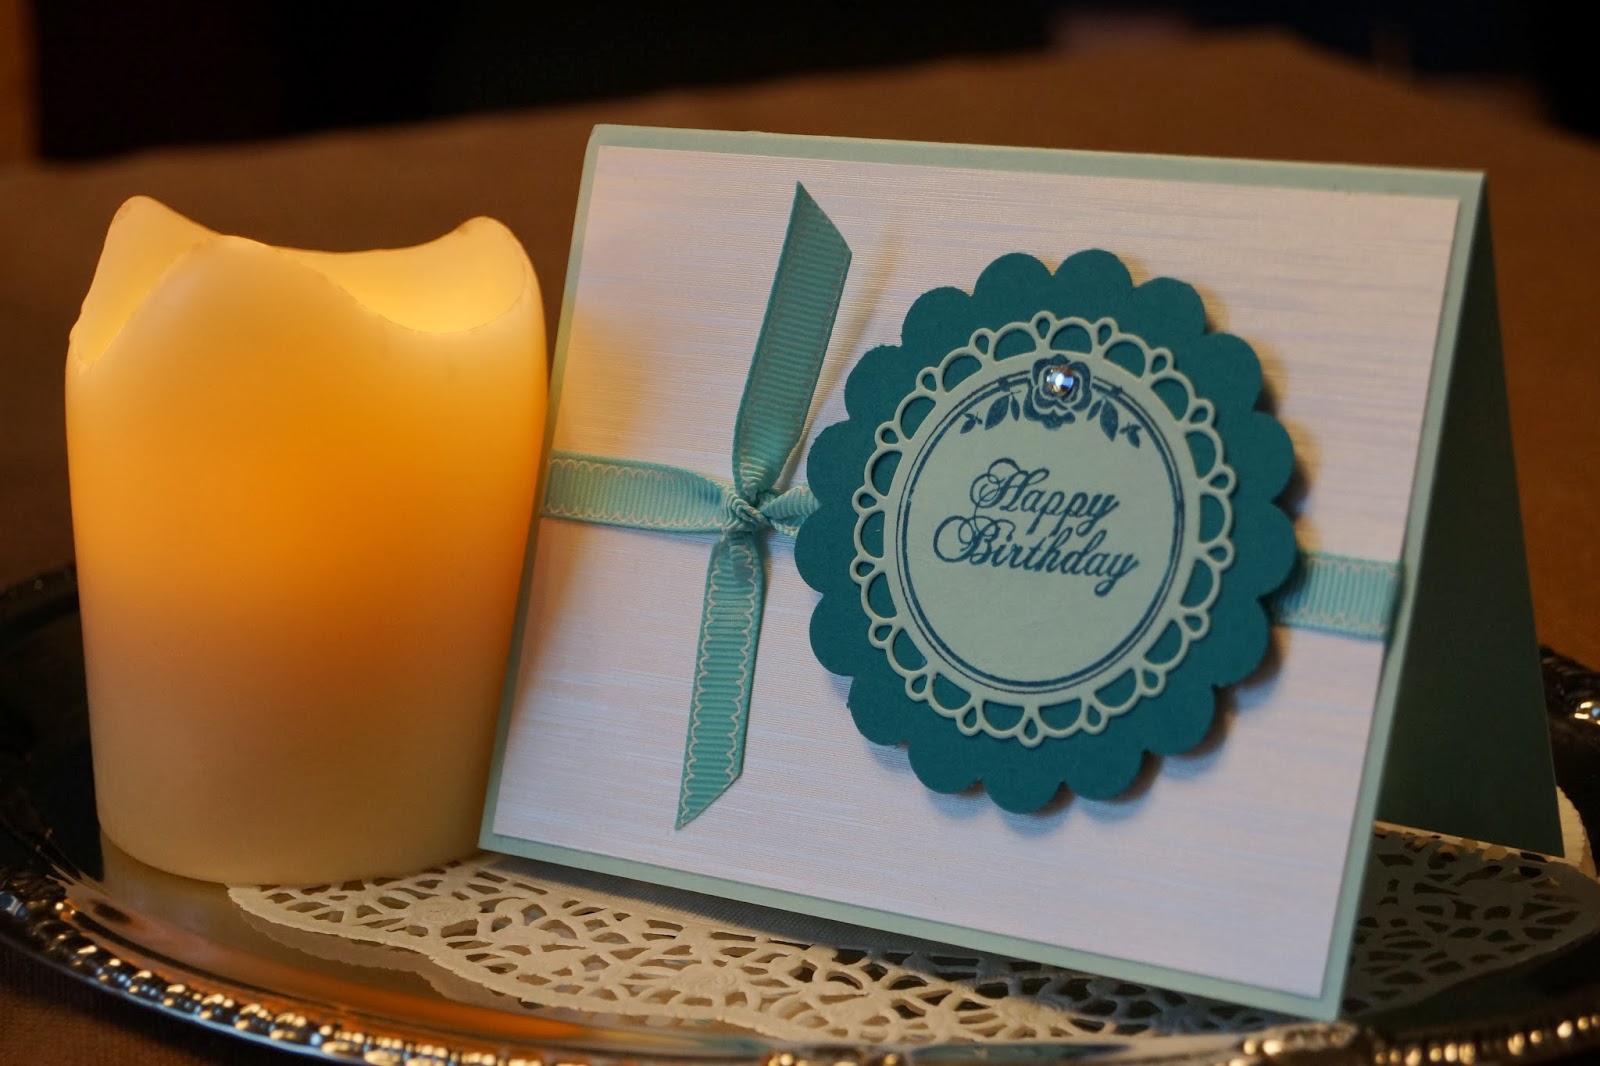
"Happy Birthday"
This teal card is very simple but also elegant at the same time.  The white card stock was embossed with a Victorian-type design. The ribbon was added.  The scalloped circle was punched. The die cut circle (on light teal) from Prickley Pear Rubber Stamps was stamped with the rose circle (also from Prickley Pear) and "Happy Birthday."  A Swarovski crystal was added to the rose.  The entire circle was then placed on the card with pop-ups. 

  
"Happy Birthday"

This is a card similar to the above with a twist.  Stampin' Up came out with a bird/branch stamp to match the bird/branches punch they developed.

First, the DP was attached to yellow CS and mounted to the card. A rectangular piece of yellow CS was cut.  A smaller piece of light teal was cut as shown above and a notch was cut in the end. "Happy Birthday" was stamped.  A teal-colored brad was inserted towards the left end, teal strip mounted onto the yellow CS, then secured on the DP.

The Stampin' Up bird and branches were stamped on yellow CS with black ink and embossed with clear powder. The Stampin' Up punch was used to punch the bird and branches out. The branches were positioned and Aleene's Tacky Glue used to secure them. The bird had pop-ups applied and adhered to the circle.  The feet were lightly glued down to the branch. 


That's it for today!  Keep stamping!

Linda

"Be still and know that I am God." Psalms 46:10


Monday, October 14, 2013

Cards Creations Before Blogging

Hi Friends!

Since I've decided to post some cards that I made before I started the Cardworks blog, I'd just like to put out there that I won't be able to be specific with exact numbers, measurements and brand names of everything because my memory isn't THAT long! So, please, just enjoy them!


"For You"


The background on this card was embossed with a swirl design, then the surface was lightly rubbed with a blue distress ink.  The rest of the card was stamped with the same blue distress ink. The raised flower below the bird was fussy cut and graduated with Copic markers.  The center was filled with yellow Flower Soft material.  The bird & design are from Stampin' Up.

Please leave a comment & thanks for visiting my blog.

Linda


"Be still and know that I am God." Psalms 46:10

Saturday, October 12, 2013

Day Four of my Cardworks Blog!

It's been fun posting my cards and cruising around the other blogs.  Experience will teach me a thing or two!

Here is my next card:

Love, Anniversary or Valentine's Day Card


This is a versatile card and can be used in the above three ways.  The pink heart was die cut & embossed; then a running stitch was placed around the edge with embroidery thread. The card stock is obviously a darker red. The white CS was cut short width-wise in order to accommodate the red round rhinestones. The CS was run through the Cutlebug with a swirl-type embossing folder with enough smooth surface kept in order to paper punch it with the lacy design.  There is also a second piece of white CS that was also paper punched (but not embossed).

Between the two white CS pieces, I took five pieces of designer paper (these were scraps from old valentines) and cut them to fit evenly. The short white piece of CS was adhered first to the surface of the card itself with DST.  The small DP pieces were adhered to the white CS with double-sided tape. Make sure to butt the seams together tightly without any gaps between the pieces of paper.  The embossed white CS was added on top of the designer-paper pieces (covering over the top edges of the DP) with DST.  The pink heart was secured with glue dots.  The rhinestones had adhesive on the backs and were securely placed evenly on the right front side of the card.  The last step was putting the piece of embroidery floss around the card and tying a bow.

The cards from days two, three and four did not have exact measurements given because these cards were mailed, so I don't have them to measure. They were, however, all standard A2 cards.

Day four completed!

Friday, October 11, 2013

Cardworks, Day Three

Today is day three for my blog and so I am posting two pictures of the same card.  This is a good card for sympathy or encouragement. 

The verse is stamped first with VersaMark and then embossed with a green metallic-type powder.  Then I placed the following layers: (1) Spellbinders die (2) Two to three sheets of wax paper, and (3) the paper, carefully centering it.  The wax paper helps the green paper come out of the die more easily.  Carefully remove paper and wax paper from die; reinsert the green oval lightly into the die. I then used a dauber to lightly shade in green the outside of the verse.  If you place two or three sheets of wax paper between the piece of paper and the die, the piece will come out more easily and completely than if you just put the paper and die together.  They will get stuck if it is a complex die pattern!

I then embossed a dark green CS with a Cuttlebug and folder. Using a round punch, I reverse-rounded the corners of the paper. I attached the dark green CS to the light green card with DST.  I added the completed oval to the top of the dark green CS with pop-ups, as needed, to elevate it.

Finally, I used a mint-green satin ribbon for a bow and attached a white rose with a wire base, wrapping it around the middle of the bow.  I tried to use a large glue dot with some smaller ones to anchor the bow/rose combination but that didn't work.  I ended up leaving the glue dots in place (they were semi-sticky) and used Aleene's Quick Drying Super Tacky Glue to attach it.  I used finger pressure for several minutes to make sure it would stick.


"May God who understands..." View 1


"May God who understands each need.." Close-up View 2

I hope you have enoyed this card.  If you have any questions, please feel free to ask!


Linda

"Be still and know that I am God." Psalms 46:10
.

Thursday, October 10, 2013

Second Day of Cardworks!

Now that the initial setup of the Cardworks blog is (almost) done, it's time to concentrate on what this is all about---cards!!!

I will be posting 1-2 cards every day and give you a brief description of what was done to make the card.  I love embossing and the look that it gives to a card.  I also like to use dies, Cuttlebug folders & Cricut.  I try to give my cards a design that is rich and defining; something that no one else would think to do.  I also like to stamp envelopes to match the cards.  I also am perfecting my method of making my own envelopes.


The supplies for this card were all from Stampin' Up with the exception of the "thinking of You" stamp and border. 

One of the things to note about this card is that it is scored with Scor-Pal horizontally and vertically in evenly-spaced rows on the pink paper after is stamped.  A small flower circle was also stamped and punched out to fit in the middle of the large flower; a small pearl was added.

"Thinking of You" & border were stamped and fussy cut.  I added two small and one medium pearl and placed it on the card with 2 pop-ups.

Enjoy your day

Linda


"Be still and know that I am God." Psalm 46:10


Wednesday, October 9, 2013

Starting out brand new & taking on Prickley Pear Rubber Stamp October Challenge!!!

Welcome to my brand new blog site!!  It's been a LONG time coming but I think I finally have it figured out!

The first thing I would like to do is show you what I have been working on (off & on) for the last couple of days.  Prickley Pear Rubber Stamps (http://www.prickleypearrubberstamps-blogspot.com/) is having a Challenge that I decided to participate in.  So after working hard and being SO frustrated in trying to set up this blog, we will see how this works and I am hopeful that this will actually work.

This is the template we were asked to work with:


Here are my two cards; similar but slightly different:


So, here they are! After surviving Internet interruption in the middle of uploading the second photo, I am happy to finally have the fruit of  my labor out here.

I will be posting some of my previous  work for you to see very soon.

Thanks for taking a look and wish me luck in the Challenge!!!

Linda

"Be still & know that I am God." Psalms 46:10